
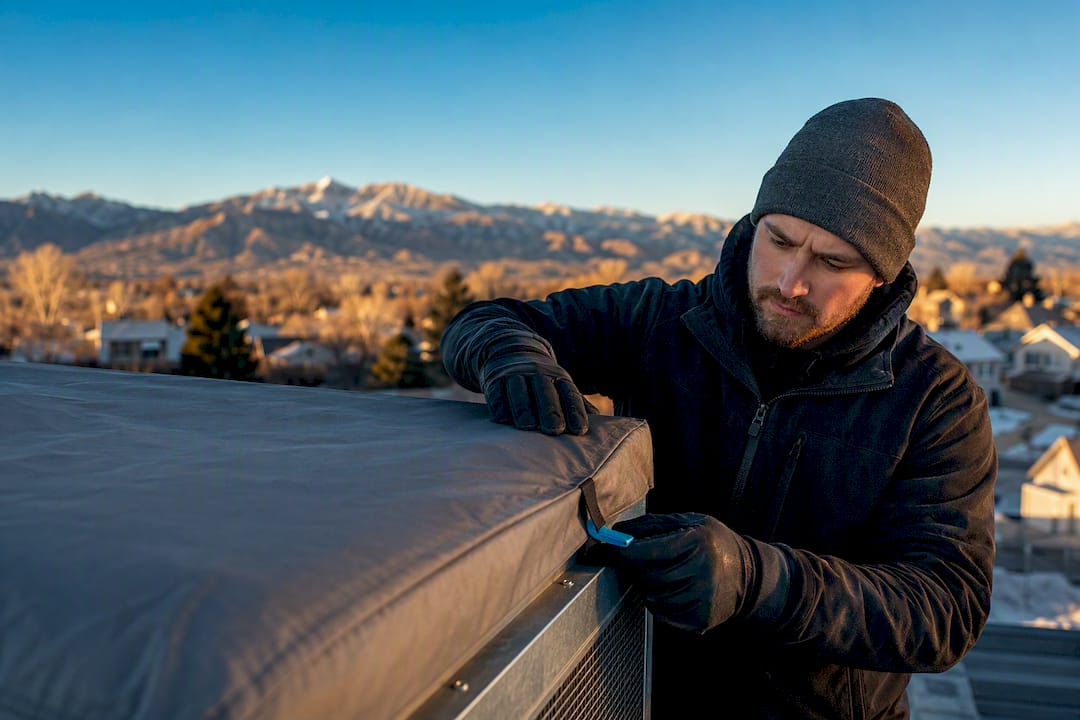
Colorado Springs: Field Tested 11 Winterizing Steps for Swamp Coolers
Winterizing a swamp cooler means shutting off its power and water, draining the lines and pan completely, cleaning and protecting the internal parts, sealing the ceiling vent, and covering the unit against snow and ice. Skip any one of those steps and you risk frozen pipes, a cracked pump, or a roof leak that shows up as a stain on your ceiling in March. If your unit sits somewhere you can’t safely reach with a ladder, call a professional rather than risk a fall.
TL;DR:
- Proper winterization prevents burst fittings, cracked pumps, and roof leaks by ensuring all water is drained and the unit is sealed before freezing temperatures arrive.
- Winterizing should be completed before the first hard freeze, ideally in late fall, with all steps including power shutoff, drainage, cleaning, and covering, to avoid costly damage.
- DIY costs are minimal, mainly involving vinegar, covers, and pads, but professional service offers thorough inspection and can cost between $100 and $385, reducing long-term repair risks.
- Skipping steps like draining completely and inspecting fittings often results in expensive repairs to pumps or roof damage, which exceed the cost of a proper winterization.
- Professionals can handle complex setups, such as roof or attic water lines, and are recommended if you are uncomfortable with ladder work or suspect existing damage.
Table of Contents
- When Should You Winterize a Swamp Cooler?
- Your Step-by-Step Winterization Checklist
- How Do You Remove Mineral Buildup and Spot Early Damage?
- Should You Remove or Store Swamp Cooler Pads?
- Ladder Safety and When to Call a Professional
- What Does Winterizing Cost, and What Mistakes Get Expensive?
- Getting Your Swamp Cooler Ready for Spring
- What We See in the Field
- Let Strong Heating And Cooling Handle the Roof Work
- Sources
- FAQ
When Should You Winterize a Swamp Cooler?
The right window is before the first hard freeze, which for most climates means sometime in late fall once cooling season is clearly over. Waiting until the forecast says freeze warning is cutting it close. Gather your tools first so you’re not making a hardware store run mid-project on a cold roof.
You’ll want:
- A sturdy ladder, a helper to spot you, and basic PPE (gloves, non-slip shoes)
- A screwdriver set, pliers or an adjustable wrench, and a shop vac or wet vac
- Towels, a bucket, and plain white vinegar for cleaning
- Bungee cords or straps, a fitted winter cover, and foam insulation for the vent
- Replacement pads if you’re swapping them, plus plastic bags and a marker for labeling belts and small parts
Having spares on hand means you won’t have to reopen the unit twice.
Your Step-by-Step Winterization Checklist
Work through these steps in order, and don’t skip ahead to draining before the power and water are confirmed off.
- Turn off power at the wall switch and the breaker. Flip both, then tape a note on the breaker panel so nobody accidentally re-energizes the unit while you’re working on it.
- Shut off the water supply valve. If your setup allows it, disconnect or cap the line rather than just closing the valve. A closed valve can still trap water that freezes and splits a fitting.
- Drain the water line fully. How you do this depends on routing. Lines that run along an exterior wall usually drain with a simple disconnect and gravity. Lines routed through an attic or roof penetration need more care since low points in the run can trap water even after you think it’s empty.
- Remove access panels to reach the interior pan and pull out the pads if you’re removing them this round.
- Drain the pan using the drain plug, or use your shop vac to pull out standing water if the plug is stuck or missing. Towel-dry whatever moisture is left; residual puddles are exactly what causes rust and mold over winter.
- Clean the pan, pump, and float. A vinegar rinse dissolves mineral scale that builds up from evaporating water all summer.
- Decide on the pads. Thin media pads are cheap and rarely worth saving; pull them. Thick honeycomb pads can last several seasons if you’re confident you can dry and store them, but leaving them in a damp unit over winter invites mold.
- Remove belts and small parts if your manufacturer recommends it. Rubber belts left under tension in cold weather can crack.
- Reinstall the access panels, fit a cover sized for your unit, and secure it with bungee cords or straps so wind doesn’t peel it back.
- Block or close the ceiling vent with a damper, pillow, or foam insert so cold air stops pouring into the house all winter.
- Tag the breaker with a note listing anything that needs attention in spring, like a pad order or a pump that sounded off before shutdown.
Pro Tip: Take a phone photo of the pan, pump, and float before you close the panels back up. Come spring, you’ll have a clear “before” reference if something looks different or a part has shifted.
This sequence follows the same logic professionals use: power off, water off, drain everything, clean, protect the pads, check the moving parts, then seal it up, according to a step-by-step breakdown from Upgraded Home.
How Do You Remove Mineral Buildup and Spot Early Damage?
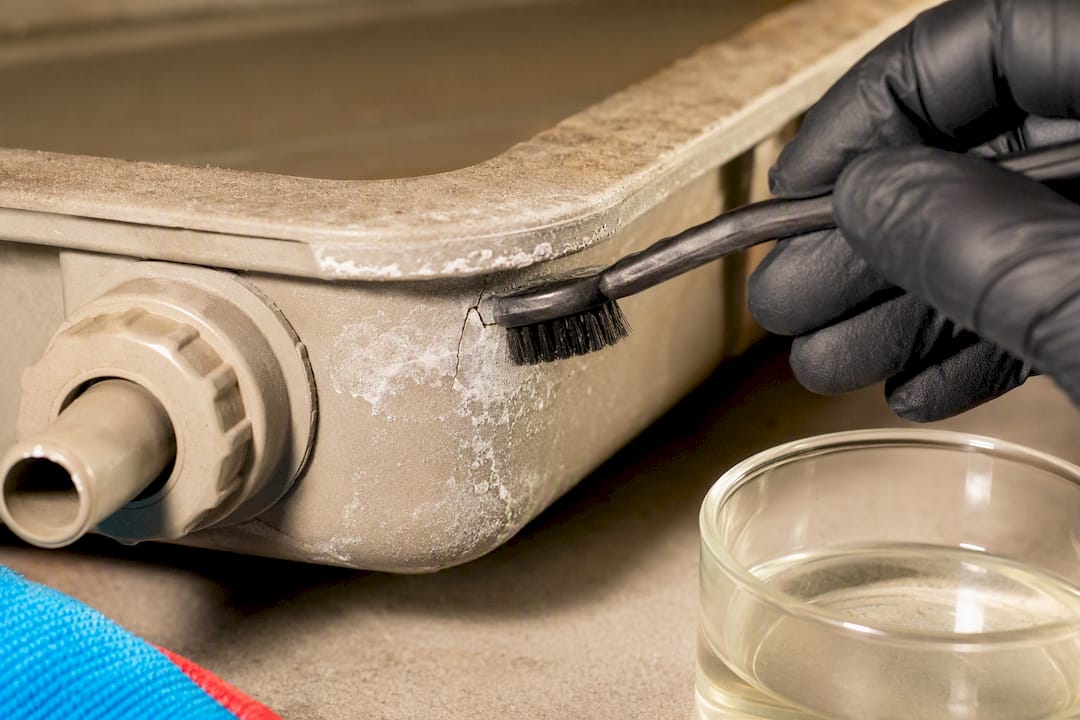
Calcium and rust scale are the most common culprits behind a pump that won’t prime in spring. A vinegar solution and a stiff brush usually cut through it, and soaking the pump and float overnight in vinegar often restores function without buying new parts, based on deposit-prevention guidance from PIEC.
While you’re in there, look closely at a few specific spots:
- Pan seams for hairline cracks or rust starting at the corners
- The drain plug for brittleness or a stripped thread
- The float valve, checking that it moves freely instead of sticking
- Distribution fittings and the pump housing for corrosion
Professional winterization visits commonly run $100 to $385 depending on scope, which is a reasonable trade against replacing a corroded pump outright. If the drain plug crumbles in your hand or the pump body shows heavy rust, that’s your signal to schedule a repair visit instead of pushing through the job yourself.
Should You Remove or Store Swamp Cooler Pads?
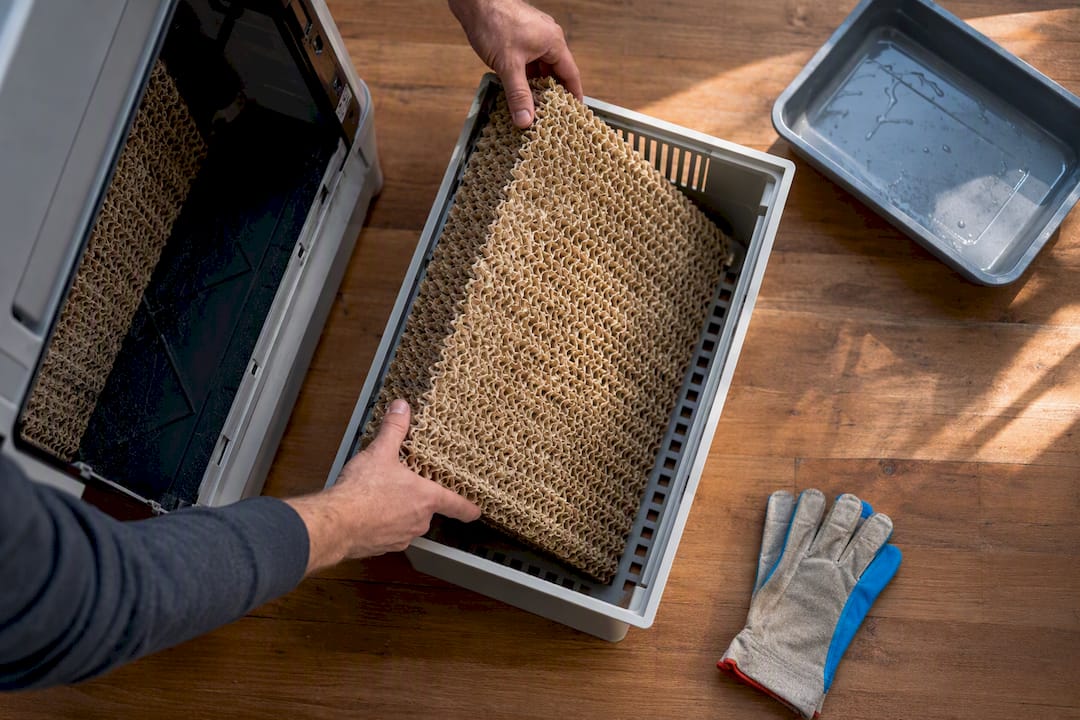
Thin cellulose pads are inexpensive enough that most homeowners just replace them each fall rather than trying to store them. Thick honeycomb pads are worth saving only if you can dry them completely and keep them somewhere covered, since pads that go into storage even slightly damp will mildew by spring.
A few habits make the difference:
- Label bags for belts, screws, and float fittings, and keep a running list of what goes where
- Store pads flat, not folded, to avoid cracking the media
- Skip storing pads at all if your cover traps condensation after snow or heavy rain
Condensation under a tight-fitting cover is a bigger mold risk than most people expect. Moist air gets trapped, has nowhere to evaporate, and settles right into whatever pad material is still inside, an issue Hunker flags directly in its winterization guidance. Pulling the pads before you cover the unit sidesteps the problem entirely.
Ladder Safety and When to Call a Professional
Never work a roof-mounted or high wall unit alone. Bring a helper to stabilize the ladder, skip the job entirely if wind or wet conditions make the roof unstable, and don’t rush the descent with tools in hand.
Call a professional if any of the following applies to your setup:
- The water supply line runs through the attic or across the roof, where hidden low points are hard to drain completely
- You spot rust, a leak, or a fitting that looks cracked
- You’re not comfortable on a ladder or roof, period
Roof-routed lines add real complexity, since fittings at the roof penetration are more exposed to freeze cycles and harder to inspect without proper access. That’s often reason enough to hand the job to someone who does this daily, particularly through Strong Heating And Cooling’s swamp cooler services. Some companies bundle fall winterization with the spring startup visit, which can reduce the cost compared to paying for two separate calls.
What Does Winterizing Cost, and What Mistakes Get Expensive?
Doing it yourself is cheap. A jug of vinegar, a fitted cover, and maybe a set of replacement pads will run you well under the cost of a single service call. Hiring a pro for winterization commonly falls in the $100 to $385 range depending on how much cleaning and inspection the job includes.
The mistakes that get expensive aren’t complicated. They’re just skipped steps: not draining the line fully, leaving standing water in the pan, or not checking for brittle fittings before winter hits. HomeAdvisor notes that repair costs from freeze damage frequently exceed what a winterization visit would have cost in the first place. A $150 service call is a lot easier to swallow than a cracked pump housing or a roof leak traced back to a frozen fitting.
Getting Your Swamp Cooler Ready for Spring
Winterizing well now makes spring startup fast instead of stressful. Run through this short list once temperatures climb back up:
- Reinstall or replace the pads, checking for mold if you left any in place over winter
- Reconnect the water line and watch closely for leaks at every fitting
- Pull the foam or damper out of the ceiling vent
- Run the pump briefly and listen for grinding, squealing, or hesitation before it primes
Any odor of mildew, a squealing belt, or a pump that won’t prime points to a problem that built up over winter, according to failure-mode observations from Upgraded Home. If you hear any of that, it’s worth a professional look before you rely on the cooler through the first hot week.
What We See in the Field
Over 40-plus combined years in Colorado Springs HVAC work, the pattern repeats every spring: units left running water into a pan all winter show up with cracked pumps or stained ceilings from a slow roof leak nobody noticed until startup. A $150 winterization visit in October routinely prevents a repair bill several times that size. If your line runs through the attic or you’re not sure the pan drained completely, get it checked before the first freeze rather than after.
— Owner
Let Strong Heating And Cooling Handle the Roof Work
Strong Heating And Cooling gives Colorado Springs homeowners a way to skip the ladder entirely. Technicians can handle the inspection, draining, cleaning, and covering of the unit in a single visit.

A typical service call includes draining the lines and pan, cleaning mineral buildup, checking the float and pump for wear, securing a proper cover, and giving you a straight report if anything needs repair before spring. Our swamp cooler services can be scheduled as a one-time visit or folded into a residential maintenance plan that bundles fall winterization with spring startup, so you’re not paying for two separate trips. If you’d rather not spend a Saturday on a ladder, consider contacting a professional for a quote and scheduling.
Sources
- HomeAdvisor — Repair a swamp cooler cost overview
- Upgraded Home — How to winterize a swamp cooler (step-by-step)
- Hunker — How to get your swamp cooler ready for winter
FAQ
How Do You Shut Down a Swamp Cooler for Winter?
Turn off the power at the wall switch and breaker, shut off and drain the water supply line, drain and dry the pan, clean mineral buildup, remove or protect the pads, then seal the vent and cover the unit.
How Much Does It Cost to Winterize a Swamp Cooler?
DIY winterizing costs very little beyond vinegar, a cover, and possibly new pads, while professional visits commonly run $100 to $385 depending on how much cleaning and inspection is included.
Will a Swamp Cooler Work in 100 Degree Heat?
Evaporative coolers lose effectiveness as humidity rises, but in hot, dry climates they still lower indoor temperatures noticeably at 100 degrees, provided the pads are clean and saturated and the unit gets proper airflow.
What Can I Put in My Swamp Cooler to Make It Colder?
Fresh, cool water and clean, fully saturated pads make the biggest difference in cooling power. Ice in the reservoir gives a short-term boost but isn’t a substitute for properly maintained pads and adequate airflow through the house.
When Should I Call a Professional Instead of Winterizing Myself?
Call a professional if your water line runs through the attic or roof, if you spot rust or a leak, or if you’re not comfortable working on a ladder. Strong Heating And Cooling’s swamp cooler services can handle the full winterization safely in one visit.
Recommended
Need expert HVAC help?
Colorado Springs' trusted, veteran-owned heating & cooling team — same-day service.