
How to Fix a Condensate Drain Clog Safely
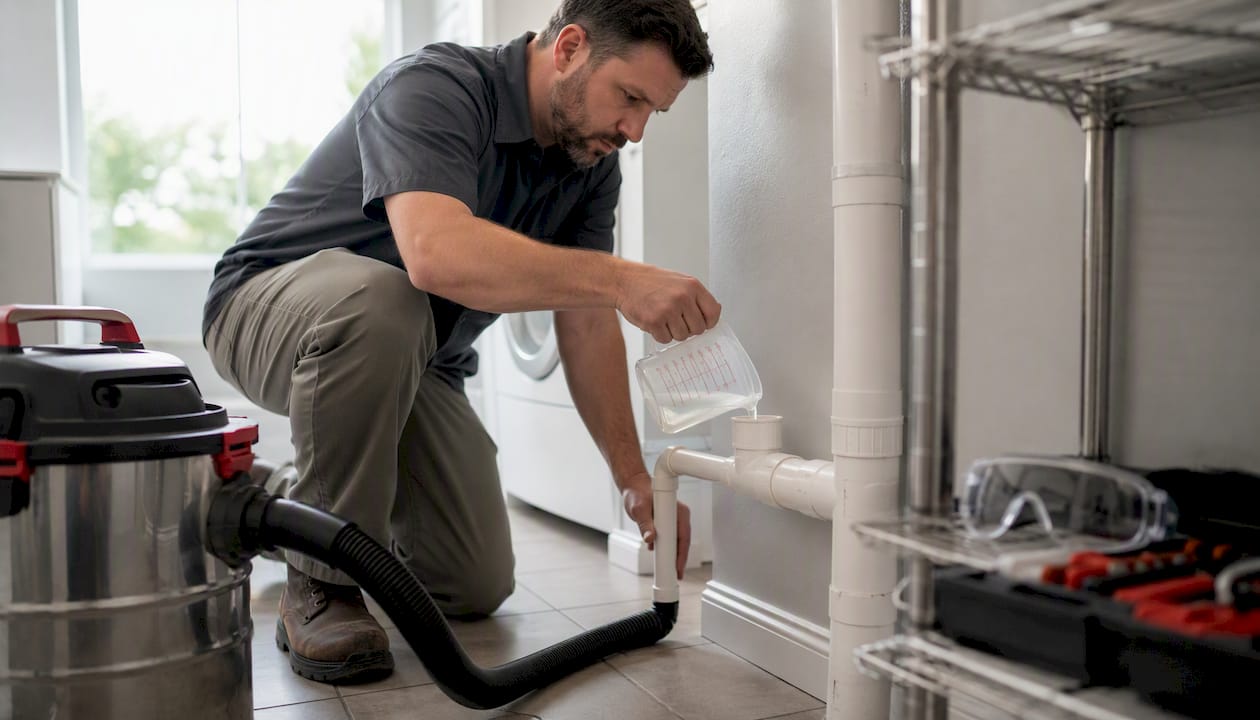
If your home has a condensate drain clog, start by powering off the air handler at the breaker, checking the condensate pan for standing water, and trying a one-cup distilled white vinegar flush through the indoor T-access or a wet/dry vacuum at the outdoor drain stub. According to field experience from HVAC professionals, most residential clogs clear with these two methods alone, because most blockages are biological slime and dust sitting near the pan or the outdoor exit point.
Before you open any access panel, cut power at the breaker and at the thermostat. Do not rely on just switching the thermostat to “off.” If you see active mold growth, water staining on ceilings or walls, or any sign of electrical damage near the unit, stop and call a professional. The same applies if your system is still under a manufacturer warranty that restricts homeowner maintenance.
Quick first-response checklist:
- Power off at the breaker and thermostat
- Check the condensate pan for standing water
- Remove the T-access cap and pour one cup of distilled white vinegar
- Wait 15–30 minutes, then flush with clean water
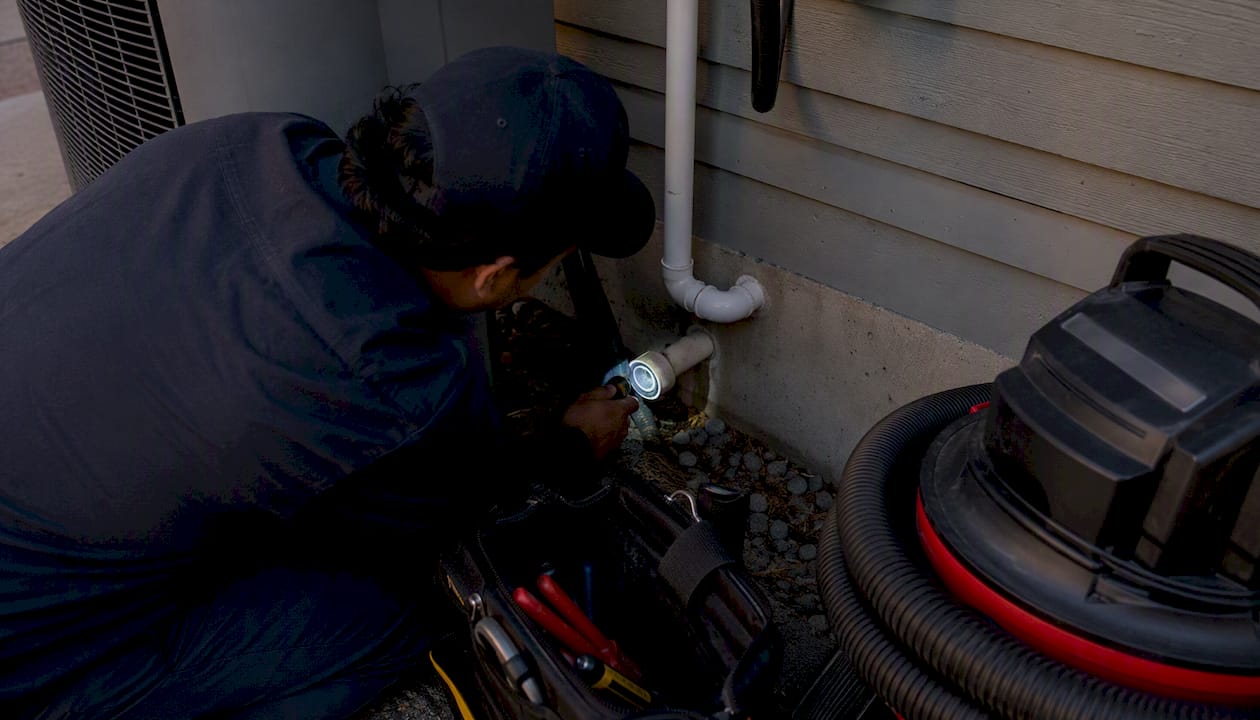
- Alternatively, seal a wet/dry vacuum over the outdoor stub and run it for 2–3 minutes
Pro Tip: Distilled white vinegar works because its mild acidity breaks down the biofilm that causes most clogs. Avoid apple cider vinegar or any cleaning product with surfactants, which can leave residue in the line.
Key Takeaways
Clearing a condensate drain clog safely starts with cutting power at the breaker, then using a distilled vinegar flush or wet/dry vacuum at the outdoor stub, both of which resolve the vast majority of residential blockages.
| Point | Details |
|---|---|
| Power off first | Always cut power at the breaker before opening any drain access or touching the pan. |
| Vinegar flush or vacuum | One cup of distilled white vinegar or a wet/dry vacuum at the outdoor stub clears most clogs. |
| Avoid caustic products | Drano, large amounts of bleach, and boiling water can damage PVC, pump seals, and metal components. |
| Test the float switch | After any drain service, pour water into the pan to confirm the safety shutoff trips correctly. |
| Strongheatingandcooling | For recurring clogs, pan damage, or pump failure in Colorado Springs, Strongheatingandcooling provides full drain service with transparent pricing. |
Table of Contents
- What is a condensate drain line and where do you find it?
- Signs your condensate drain is clogged
- Tools and safety prep before you unclog the drain line
- How to unclog an AC drain line step by step
- How to clean and sanitize the drain pan and line after clearing
- A maintenance routine that keeps the drain line clear
- Safety, code, and warranty notes you need to know
- When should you stop DIY and call an HVAC professional?
- What to do when the line still won’t drain
- How HVAC professionals handle stubborn condensate clogs
- What we see most often at Strongheatingandcooling
- Strongheatingandcooling can clear your drain line and protect your system
- Sources
- FAQ
What is a condensate drain line and where do you find it?
The condensate drain line is a PVC pipe that carries water away from the evaporator coil’s drain pan. As your air conditioner runs, it pulls humidity out of the air, and that moisture drips off the coil into a shallow pan beneath it. The drain line moves that water out of the home, either to an exterior wall, a floor drain, or a condensate pump.
Common locations for the indoor components:
- Air handler or furnace closet (most common in Colorado Springs area homes)
- Attic-mounted air handler (water exits through a pipe penetrating the ceiling or exterior wall)
- Crawlspace installations, where the line typically runs to daylight near the foundation
- Furnace-adjacent setups in basements, where the line may connect to a floor drain
The indoor T-access point is a T-shaped fitting with a removable cap, usually located on the horizontal run of PVC close to the air handler. The outdoor termination is typically a 3/4-inch PVC stub protruding from an exterior wall or near the foundation, often 6–18 inches above grade.
Pro Tip: Run your AC for 10 minutes on a warm day, then check the outdoor stub. You should see a slow, steady drip. No drip at all is one of the earliest signs of a condensate line blockage.
Signs your condensate drain is clogged
Lennox and other manufacturers note that clog symptoms include standing water in the drain pan, musty odors, and system shutdown when a float safety switch trips. Knowing which symptom you have helps you choose the right fix.
Visual signs to check first:
- Standing water in the primary drain pan under the coil
- Water on the floor around the air handler or furnace
- New ceiling stains or soft drywall directly below an attic-mounted unit
- A wet secondary pan or overflow line actively dripping
System behavior that points to a blocked line:
- AC shuts off unexpectedly and won’t restart (float switch has tripped)
- No drip at the outdoor stub while the unit is running
- Musty or moldy smell coming from supply vents
- Gurgling sounds from the drain line during operation
Quick diagnostic steps to confirm a clog:
- Remove the T-access cap and look for standing water in the line.
- Pour one cup of water directly into the pan and watch whether it drains within a few minutes.
- Check the outdoor stub during operation for a steady drip.
If water sits in the pan and the outdoor stub stays dry, you have a blockage somewhere in the line.
Tools and safety prep before you unclog the drain line
Getting the right materials together before you start saves time and prevents damage. Trane’s guidance confirms that technicians use wet/dry vacuums, snakes, and vinegar flushes as standard methods, and they always power off the unit before opening access.
Essential tools and materials:
- Wet/dry (shop) vacuum, 5–16 gallon capacity
- Rubber adapter or wet rag to create a tight seal at the outdoor stub
- Screwdriver to remove the T-access cap
- Flashlight to inspect the pan and line
- Bucket and old towels to catch water
- Distilled white vinegar (one to three cups)
- Small flexible pipe brush or drain brush sized for 3/4-inch PVC
- Gloves and eye protection
Safety checklist before you begin:
- Turn off power at the indoor unit breaker, not just the thermostat
- Confirm the blower has stopped completely before opening any access
- Place towels around the base of the air handler to catch overflow
- Do not restore power until all caps are replaced and the area is dry
Avoid Drano, bleach in large quantities, and boiling water. Caustic drain cleaners can corrode PVC fittings, damage condensate pump components, and react unpredictably with other materials in the line. Boiling water can warp PVC or soften the seals on pump housings. Distilled white vinegar or hot (not boiling) tap water are the safe choices, as Carrier’s guidance confirms.
Pro Tip: Check your system’s owner’s manual before doing any DIY work. Some manufacturer warranties include language that limits homeowner modifications to the drain system. A quick read now prevents a costly warranty dispute later.
How to unclog an AC drain line step by step
Follow these steps in order. Most homeowners resolve the problem by step four.
-
Power off the system. Turn the thermostat to “off,” then flip the indoor unit breaker. Wait for the blower to stop completely before touching anything.
-
Locate and open the T-access. Find the T-fitting on the indoor PVC run near the air handler. Unscrew or pull off the cap. If the line is fully blocked, water may be sitting right at the opening, so have a towel ready.
-
Pour one cup of distilled white vinegar into the T. Let it sit for 15–30 minutes. The mild acid softens the biofilm that makes up most clogs, and field data shows that this simple flush resolves the majority of residential blockages.
-
Vacuum from the outdoor stub. If the vinegar flush alone does not clear the line, take your wet/dry vacuum outside to the drain termination. Press a wet rag or rubber adapter firmly around the stub to create a seal, then run the vacuum for 2–3 minutes. The suction pulls the loosened clog out from the exit end.
-
Use a flexible brush or small snake if needed. If vacuuming fails, insert a flexible pipe brush or a small drain snake through the indoor T-access. Work it gently through the line. Do not force a rigid metal auger into small-diameter PVC; it can crack fittings or puncture the pipe.
-
Flush and verify. Pour 2–3 cups of clean water into the T-access and watch the outdoor stub for a steady drip. Replace the T-cap, restore power, and run the system for 10 minutes to confirm normal drainage.
Stop and call a professional if you find mold you cannot safely remove, collapsed or cracked PVC, a failed condensate pump, or if the clog returns within a few weeks of clearing it.
Pro Tip: After vacuuming, shine a flashlight into the T-access before flushing. If you can see clear pipe all the way through, the clog is gone. If the view is still dark or obstructed, repeat the vacuum step before restoring power.
How to clean and sanitize the drain pan and line after clearing
Clearing the clog is only half the job. Biofilm left in the pan will reform quickly and send you back to step one within weeks.
Pan cleaning steps:
- Remove any standing water with a wet/dry vacuum or towels.
- Wipe the pan with a 1:1 mixture of water and distilled white vinegar, or use a mild dish detergent.
- Inspect the pan for rust spots, hairline cracks, or holes. A damaged pan will leak regardless of whether the drain line is clear, and it needs replacement.
Line sanitizing:
- Pour one cup of distilled white vinegar through the T-access after cleaning the pan.
- Wait 30 minutes, then flush with two cups of clean water.
- If you prefer a commercial product, use an EPA-registered HVAC pan treatment tablet. These dissolve slowly and inhibit algae growth between maintenance visits.
Products to avoid in the line:
- Drano and similar caustic drain openers
- Large quantities of bleach (can corrode metal components and react with other residues)
- Boiling water (can deform PVC and damage pump seals)
Pro Tip: Drop one HVAC pan treatment tablet into the drain pan after cleaning. Most tablets last 30–90 days and significantly slow biofilm regrowth, especially in humid summer months.
After sanitizing, run the AC and confirm a steady drip at the outdoor stub. Then test the float switch by pouring a cup of water directly into the pan until the float rises. The system should shut off. If it does not, the float switch needs adjustment or replacement.
A maintenance routine that keeps the drain line clear
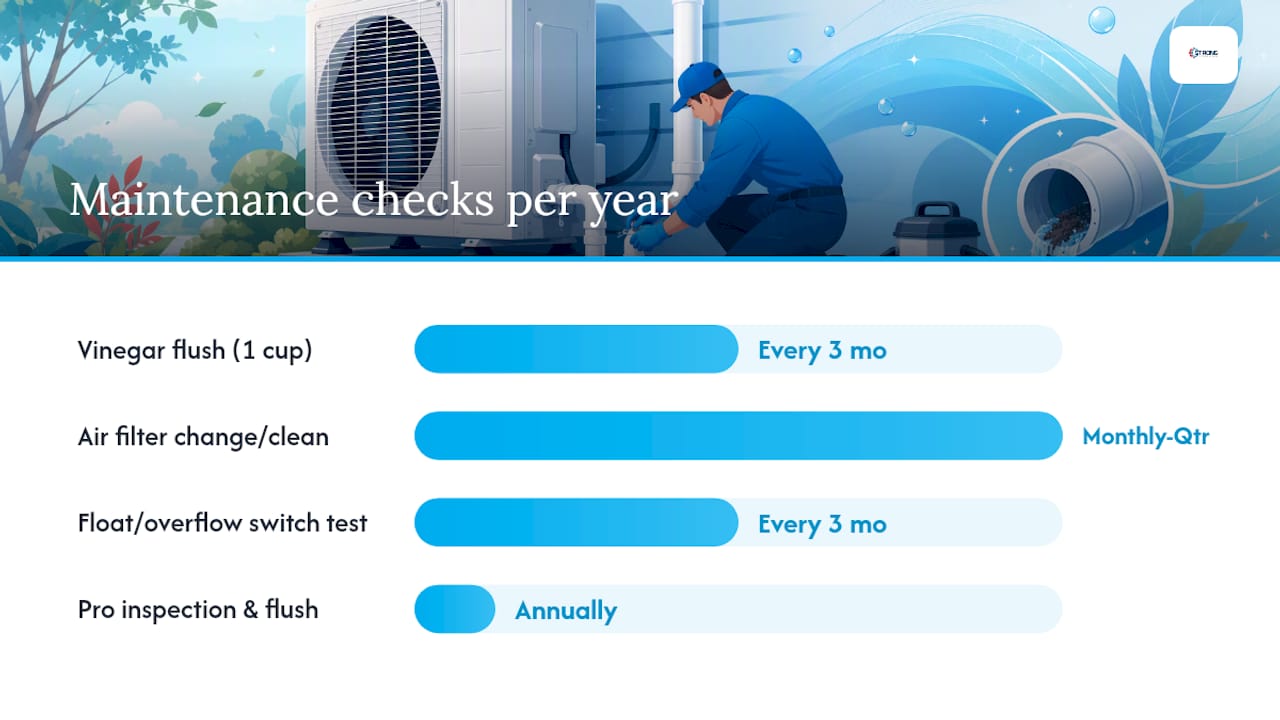
Prevention is straightforward and takes less than five minutes per quarter. A consistent vinegar flush every three months during cooling season prevents most clogs before they start, and pairing that with regular filter changes keeps debris out of the coil and pan in the first place.
Maintenance schedule:
| Action | Frequency | Why it matters |
|---|---|---|
| Distilled vinegar flush (1 cup) | Every 3 months (spring, mid-summer, early fall) | Dissolves biofilm before it hardens into a full clog |
| Air filter change or cleaning | Monthly to quarterly, based on MERV rating and household conditions | Less dust reaching the coil means less sludge accumulating in the pan |
| Float/overflow switch test | Every 3 months, after any drain service | Confirms the safety shutoff will protect the home if drainage fails |
| Professional drain inspection and flush | Annually, as part of a spring tune-up | Catches slope problems, trap issues, and early pan corrosion |
Additional installations worth considering:
- A float/overflow switch if your unit does not already have one
- A secondary drain pan for attic or above-ceiling units, where an overflow would damage drywall or insulation
- A condensate pump with a built-in shutoff switch where gravity drainage is not possible
Keeping the outdoor termination clear matters too. Mulch, mud daubers, and insect nests commonly block the outdoor stub, especially in summer. Check it visually each time you do your quarterly flush and clear any debris from the opening.
For a broader seasonal checklist, the preventive HVAC maintenance schedule from Strongheatingandcooling covers filter changes, coil checks, and pre-season startup steps in one place.
Safety, code, and warranty notes you need to know
These are not optional details. Getting the drain routing wrong can void a warranty, fail an inspection, or cause water damage that a homeowner’s insurance policy may not cover.
Key code requirements:
- IMC 307.2.3 and related sections require condensate drains to be accessible and clearable without cutting the pipe. If your drain line has no T-access, that is a code deficiency.
- Equipment installed in locations where overflow would damage building components must have a secondary drain, overflow pan, or water-level monitoring switch. Attic units are the most common example.
- Condensate discharge cannot connect directly to a plumbing vent stack in most jurisdictions. It must discharge to an approved drain, to daylight, or to a condensate pump.
P-trap and venting:
- A P-trap is typically required by the manufacturer and by code where the condensate line connects to a building waste system. The trap prevents sewer gases from entering the air handler.
- A vent after the trap prevents airlocks that stop drainage even when the line is physically clear.
HVAC School’s guidance on condensate drain codes emphasizes that improper float-switch wiring is a common reason overflow protection fails. A float switch wired to break the wrong circuit may allow the blower to keep running while drainage is blocked, which accelerates water damage rather than preventing it.
Warranty note: some manufacturers limit homeowner modifications to the drain assembly. Before re-routing any PVC or replacing a pan, check the unit’s manual. Document what you did and when, in case a warranty claim comes up later.
Pro Tip: After any drain service, test the float switch by slowly pouring water into the pan until the float rises. The system must shut off. If it does not, the switch is either wired incorrectly or positioned too high to trip before overflow occurs.
When should you stop DIY and call an HVAC professional?
Some drain problems are beyond what a vinegar flush and a shop vac can fix. Recognizing those situations early saves money and prevents water damage from getting worse.
Call a professional when:
- The clog returns within a few weeks of clearing it
- You find visible mold growth that requires remediation, not just cleaning
- The evaporator coil is frozen or shows ice on the lineset near the indoor unit
- Water has leaked into walls, ceilings, or insulation
- The condensate pump is not running or its float is stuck
- The drain line runs through finished walls or ceilings with no accessible T-fitting
What a professional will do:
- Inspect the trap, vent, and slope of the entire drain run
- Use a commercial wet/dry vacuum, mechanical snake, or compressed nitrogen to clear stubborn blockages
- Replace damaged sections of PVC, a corroded pan, or a failed condensate pump
- Test and correctly wire the float switch
- Diagnose slope or design problems that cause recurring clogs
Cost expectations: a standalone drain-line clearing visit typically runs within a moderate cost range depending on your region and the complexity of the job, based on pricing data from HVAC service resources. Repairs involving re-piping, pan replacement, or pump installation cost more.
| Service type | Typical cost range | When it applies |
|---|---|---|
| Drain line clearing (basic) | $100–$250 | Single clog, accessible line, no damage |
| Pan replacement | Varies by unit | Corroded, cracked, or leaking pan |
| Condensate pump replacement | Varies by unit | Failed pump or stuck float |
| Drain re-routing or re-piping | Varies by complexity | Slope problems, double-trap, hidden runs |
Pro Tip: Ask the technician to demonstrate the float-switch test before they leave. A good tech will pour water into the pan and show you the system shutting off. If they skip this step, ask for it.
What to do when the line still won’t drain
If you have followed every step and drainage is still failing, the problem is likely one of these less-common causes.
Check these in order:
-
Blocked outdoor termination. Go outside and look at the stub. Mud daubers, insect nests, mulch, and even landscaping fabric can seal the opening completely. Clear it and retest.
-
Condensate pump failure. If your system uses a pump instead of gravity drainage, check that the pump is receiving power and that its float moves freely. A stuck float or a burned-out pump motor will stop drainage entirely regardless of whether the line itself is clear.
-
Improper slope or double-trap. Horizontal PVC runs need a consistent slope toward the drain. A sag in the line creates a low spot that holds water and accelerates biofilm. A double-trap creates an airlock. Both require re-piping to fix permanently.
-
Frozen evaporator coil. Ice forming on the coil produces far more water than the drain system is designed to handle when it melts. Check for ice on the lineset near the indoor unit. A frozen coil usually points to a refrigerant issue or severely restricted airflow, not a drain problem.
-
Cracked or corroded drain pan. If the pan has a hole, water bypasses the drain line entirely and goes directly onto the floor or into the ceiling below. Pan replacement is the only fix.
How HVAC professionals handle stubborn condensate clogs
Understanding what a pro brings to the job helps you decide when the call is worth making.
Professional tools and methods:
- Commercial wet/dry vacuums with purpose-built adapters that create a better seal than a shop rag
- Mechanical snakes designed specifically for 3/4-inch and 1-inch PVC, which flex through bends without cracking fittings
- Compressed nitrogen or water-jetting equipment for hard, deep clogs that suction alone cannot move
- Targeted section replacement when a run is damaged, undersized, or improperly sloped
Diagnostic steps that go beyond what a homeowner can check:
- Pressure testing the line to locate hidden blockages or cracks
- Inspecting trap depth, vent placement, and float-switch wiring
- Accessing drain runs behind finished surfaces without unnecessary demolition
- Testing condensate pump float setpoints against manufacturer specifications
Trane’s technical guidance notes that qualified technicians will inspect and test float and overflow switches as part of any drain-clearing service, not just clear the line and leave. That final switch test is what separates a complete repair from a temporary fix.
Pro Tip: Compressed nitrogen is effective on hard clogs but requires training to use safely. Too much pressure can blow apart a glued PVC fitting or force water back into the air handler. This is not a homeowner technique.
Why professional involvement reduces risk: re-routing a drain line incorrectly, installing a trap in the wrong location, or wiring a float switch to the wrong circuit can all cause more damage than the original clog. Strongheatingandcooling’s service process covers inspection, transparent diagnosis, clearing or repair, sanitizing, and a float-switch test before the technician leaves, backed by over 40 years of combined HVAC experience serving Colorado Springs and surrounding communities.
What we see most often at Strongheatingandcooling
The most common condensate problems we find in Colorado Springs homes are not complicated. A small PVC exit stub blocked by a mud dauber nest, a filter that has not been changed in six months pushing debris into the coil, or an attic unit with no overflow protection at all. These are preventable with a quarterly vinegar flush and a consistent filter schedule. What makes the difference is catching them before water reaches the ceiling.
With over 40 years of combined experience, our team focuses on clear communication and fixes that hold. We tell you exactly what we found, what it will cost, and what you can do to prevent it from happening again.
Strongheatingandcooling can clear your drain line and protect your system
When a vinegar flush and a shop vac are not enough, Strongheatingandcooling provides the full range of condensate drain services for homeowners in Colorado Springs and surrounding communities: drain line clearing, condensate pump service and replacement, drain pan inspection and replacement, float-switch installation and testing, and annual tune-ups that include a complete drain inspection.

A service visit starts with a thorough inspection of the drain pan, line, trap, and float switch. You receive a transparent diagnosis and a clear quote before any work begins. After clearing or repairing the line, the technician sanitizes the pan, tests the float switch with water, and confirms drainage at the outdoor stub before leaving.
To schedule service or ask about a residential HVAC maintenance plan, visit the cooling services page or call Strongheatingandcooling directly. Getting ahead of a drain problem costs far less than repairing water-damaged drywall.
Sources
The following references were used to build this guide and are worth consulting for code specifics, manufacturer guidance, and deeper technical detail.
- AC Condensate Drain Line Clogged? Get Expert Help - Trane®
- How to clean AC drain line | Carrier
- AC Drain Line Clogged? How to Clear It in 20 Minutes | Venta
FAQ
Will my AC stop working if the condensate drain is clogged?
Yes, in most modern systems. When the drain pan fills, the float safety switch trips and shuts the unit off to prevent overflow damage. Clearing the clog and resetting the float restores normal operation.
What should you pour down a condensate drain line?
Distilled white vinegar is the recommended homeowner treatment, one cup poured through the indoor T-access, followed by a clean water flush after 15–30 minutes. Hot (not boiling) tap water also helps dissolve minor buildup, as Carrier advises.
Can you put Drano in a condensate drain line?
No. Caustic drain cleaners like Drano can corrode PVC fittings, damage condensate pump components, and react with other residues in the line. Distilled white vinegar or an EPA-registered HVAC pan treatment are the safe alternatives.
How much does it cost to have a professional unclog a condensate drain?
A standalone drain-clearing visit typically costs $100–$250 depending on your region and the complexity of the job. Repairs involving pan replacement, pump installation, or drain re-routing cost more.
Recommended
Need expert HVAC help?
Colorado Springs' trusted, veteran-owned heating & cooling team — same-day service.